Thursday, March 31, 2011

There has been a bit of a hiatus in DB's frame. Some depressing health stuff in the family, a very heavy work schedule and a few other things have kept me out of the shed. And all the while, I've been niggled by the fact that the right chainstay attached about 1.5mm lower than the left seat-stay. No-one other than myself would have noticed it, but it bugged me. So I decided I would fix it.


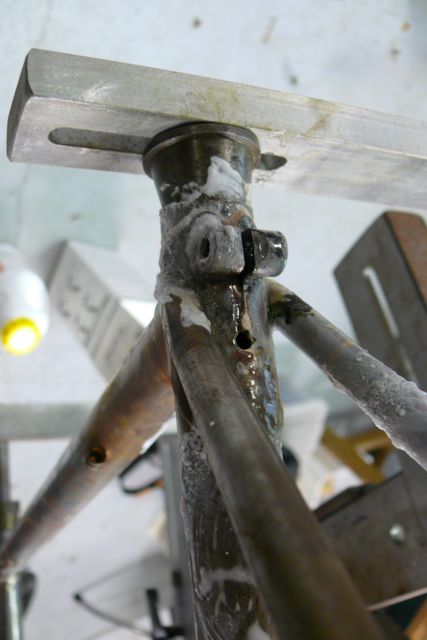
Off with the stay, clean it up, reposition it and have another crack. You can see just how much surface corrosion you get in a couple of weeks. The right one is lovely and clean, but that rust bloom just keeps coming back to freshly cleaned steel.


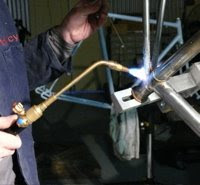
Not that you can tell once you've coated it al in flux and hit it with the torch. All fixed now, and I can stop being bothered by it.


The finished seat cluster. The end caps look nice against the seat lug - very crisp. I've been looking forward to this next bit for ages - trimming the excess off the seat tube and getting the top of the lug all tidied up...


... and after some work with the half-round file and then cutting the slot with the warding file, it's close to done. I think it might need a touch more work just to clean up the curves a little, but it's almost there.


Final task for the night - reaming the seat tube. It'll take a 27.2mm seat post and the reamer had very little work to do this time around. A tiny bit of resistance in the first 50mm or so, probably due to a bit of heat distortion, but it really didn't need much work at all. OK. enough for now. Maybe some work on the dropouts tomorrow if time permits. Nice to be back on it.

Friday, March 11, 2011

The last of the distractions. This is the bike that got me started with framebuilding. The very first time I put a brazing torch to a bike was when I cut out the crash damaged rear triangle and replaced it, converting the bike to single-speed in the process. It's been reborn with a fresh lick of powdercoat as a commuter for a friend of mine...


... after I made a new fork to replace the one I mangled when I reversed into a parking garage with the bike on the roof. The fork, like the frame is new-old-stock Columbus SLX. Long Shen crown and socket style drops. The new owner, or perhaps custodian, is stoked to say the least.


Last piece in the puzzle for this bike - the rear brake bridge. Hopefully this weekend.

Thursday, March 10, 2011

Been a bit distracted by other things. I'm putting together a singlespeed for a friend of mine as well at the moment, and the wheels, amongst other things, needed a bit of attention.


But despite the distractions, the rear end of the new frame has finally come together. Trial fit below, with the mitered seatstays in place. Is there anything that an old toe-strap can't do?


See how the seatstay end caps are mitered to fit the seat lug? This is so damn neat, and the resulting surface area will make for a hella strong connection. All of that extra tube above the lug will be coming off in the next day or two.


Both stays brazed up at the seat cluster. These are brazed with silver, which wicks into tight gaps like that really well.


While at the other end, I use brass, to build up the dropout end of things. A big excess of brass has gone on, but will be shaped back to match the chainstay end of things, with a neat scalloped edge.


Jobs to come: clean up both ends of the seatstays, trim off the seat tube and clean that up, slot the seat binder, braze in the brake bridge and the chainstay bridge.

Tuesday, March 1, 2011

Crazy weather here. We're one day out of summer and it's f'ing freezing in the Central Highlands. We've been fogbound and rainy for two days and nights and it struggled to crack double digits here until the afternoon. Last winter, I spent what could have been valuable bike building time making a wood stove for the shed. I don't regret it now.


I had an unexpected day off work, so I managed to get the chainstays on. Before getting to this point, there was fair bit of tweaking the exact shape of the oval end, and grinding the sockets to fit, but the photos only show the chainstays in the bottom bracket and the whole thing fitted up in the jig.


You can never have too much flux. The stuff's not exactly cheap, but I'd rather plaster it on than deal with the horrible burned on crap that you get if you use too little. If you use plenty, and don't burn it by keeping the torch in the one spot for too long, it all scrubs off in hot water, leaving clean shiny metal underneath. I'm happy to pay $15 a jar for that.


Checking the dropout spacing post-braze. Gotta be happy with that. It'll be interesting to see how much the paint adds to the thickness, but for now things are bang on.


And after a little clean-up, the oval chainstays are in. The photos are getting crappy, as I was shooting without a flash and my main work light blew on the weekend.


Only seatstays and little details to go.


I'm building this frame using Columbus Zona tubing. Zona is sort of the mid-range tubeset that Columbus offer, but I reckon it's one of their best. They offer the top and down tubes in two different weights/thicknesses, the seat tube takes a 27.2mm post, and they do a good range of dimensions in all of the other tubes as well. The stuff is easy to work with and impressively close to specification. One of these days I'll make something using their high-end tubes like Spirit or Life, but for the moment, Zona is really hard to beat.