Monday, October 15, 2012

Minor work

Busy time at the moment. Spring has sprung, which means crazy weather, heaps of things to do in the garden and loads of chainsawing of next year's firewood. Oh, and work is bonkers. But I managed to steal some time on this warm evening, and did some minor work on B's bike. Starting with the fork.


First, I raked the fork blades in my ghetto engineered Bend-o-Matic fork blade bender. Made from a solid lump of redgum fencepost and whatever scrap I had lying in the crap bin it does a fantastic job. Effortless, accurate and repeatable bends. And all for about $10.


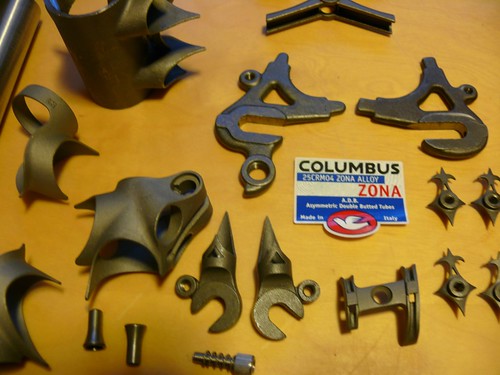
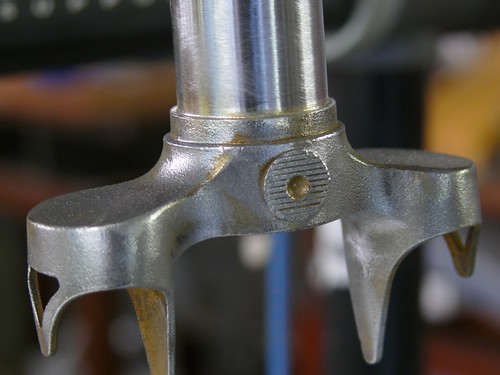
Next, I brazed on the socket style dropouts. Shown here after clean-up.


These little guys are water bottle bosses combined with an ornate diamond reinforcement with a fancy fleur-de-lys tip. I love everything about them except the fleur-de-lys, which is way to fussy for my liking.


So off for a bit of surgery to create a much simpler arrowhead design.


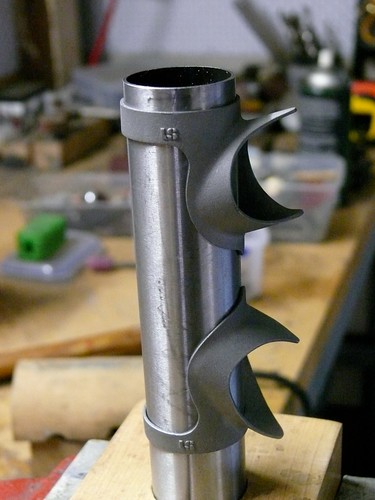
Finally, some minor work on the head lugs. I've mounted them on a short section of head tube, and the job is to file off the casting marks and manufacturer's hallmarks. I forgot to take an 'after' shot, but you get the idea.


Sunday, September 30, 2012

New bike... B's Road bike

It's been pretty quiet in the shed since I finished Dom's bike. Fortunately, I have another willing test pilot, a colleague of mine we shall call B.

B has been riding seriously for a few years, and has mainly been aboard a Surly Crosscheck. The aim of this build is to try and preserve as many of the 'contact points' of the crosscheck, but to wrap it up in a lighter, racier chassis. I've got a prototype design sorted out for her, with a more detailed fit to come in the next few weeks.


In terms of the construction, B's only request was for something that used 'simple, understated lugs'. I've been a massive fan of Mike Zanconato's aesthetic for many years now, and this was the perfect opportunity to build something in a homage to his style, based around the lovely Walter seat lug. You can see it here with the integrated seat stay ports. Very clean and simple.

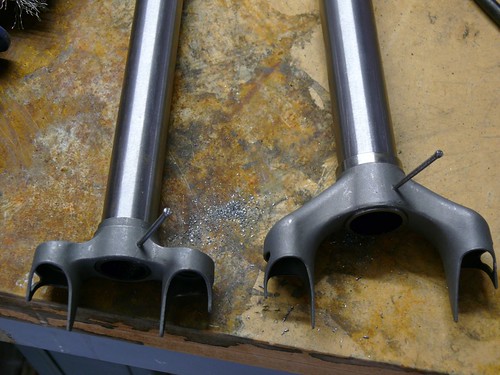
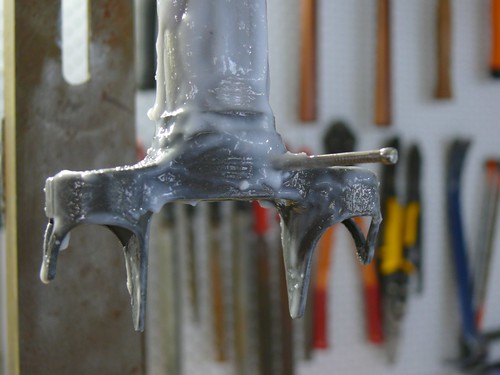
I'm still a way off committing to exact lengths and angles, but in the meantime, I thought I would start with the sub-assemblies. Fork crowns are always a good place to begin. On the right is a crown for a disc-braked cyclocross bike I'm building. It looks massive in comparison to the road fork crown. I've pretty much standardised on this sort of road fork crown. They are beautiful to work with and are super light, well machined and strong. Both crowns shown here with a pin in place to hold the crown while I braze it.


All fluxed up and ready to go...


Post brazing, with the flux soaked off...


And finally, after some clean-up.


Friday, April 6, 2012

Finally... build time.


Dura-ace 9 speed. Sure, it's not the latest and greatest, but if you don't win the race on this stuff, it'll be your legs, not the gear that held you back.


See how that mudguard snugs up into the chainstay brace? It's almost as if it was designed that way, huh?


Deda bar and stem. Nice. Now I know some of you will be thinking 'that would look far more pro with white bar tape'. Well it would. But this will still look great after hundreds of rainy kilometers. Mudguards, people. This is the bike you are out riding when all of your mates are inside.


Chris King. What else would you put there? Well, maybe a Cane Creek 100 or something that doesnt rely on a silly O-ring to align the steerer tube.


Happy customer. That's Dom Briscomb, from First Place Osteo. For all your osteo needs, especially if it's bike related.

Sunday, January 8, 2012

Embarrassing to think how long it's been since the frame was finished. Anyhoo. It's finished. Back from the painters and looking great.


The photos aren't too great - I was taking them in the failing light of the evening, but I was keen to get something up on the 'net after so long. Nice job on the fork windows - highlighted in white...


Same with the little highlights in the side of the head lugs...


Ignore the clutter behind it. And ignore the Easton bar and stem - it's just there to hold the fork on.


Rear brake bridge.


Front end...


Water bottle mounts.

Friday, April 29, 2011

post blast, pre paint

Dom's bike back from the local sandblaster. I'll have to keep it somewhere warm and dry until it hits the painters: freshly blasted steel rusts like a mofo.


the whole frame...


head tube...


top tube...


lower head lug and fork crown...


brake bridge...


bottom bracket and bridge....

Hopefully the next shot has it with some paint on it.

Sunday, April 24, 2011

And now for something completely different...

Making some stainless ring-bolts for rock-climbing applications.


30 odd lengths of 316 stainless, cut to length and then a section of texture added with the angle grinder....


... and half a dozen deep notches added to the end of the shaft to provide maximum adhesion for the glue without compromising the strength of the rest of the bolt.


The bender, in all its junkyard glory. The square table thingy pivots on some big bearings, and the thick bit of steel rod in the middle is the former around which the rings bend.


The finished product. All of the bending is done cold, and there is quite a bit of spring in the steel, which means it is impossible to close the ring up completely, so once all the bending...


...is done and all of the rings are ready for welding...


...they go into the next step, which is a little hydraulic press made from an old car jack I found at the rubbish dump. The ring goes into a little slot and then after a few pumps on the jack handle, the ring closes up enough to weld.


Tack weld done in the hydraulic press holds the ring shut until I can do the full pass...


with the TIG welder and some 316 filler rod. There is one final step - to pickle the rings in an acid solution to remove the oxide scale and restore their corrosion resistance. It's hideously toxic though and I'll wait until I've finished the whole process before I do it. But that's the process in a nutshell.

Thursday, April 14, 2011

And last of all, the chainstay brace.

All mitered up, and snug against the squared off points of the bottom bracket lug.


And from another angle...


This chainstay brace was brought to you by Coopers Stout. You can see the frame - toasty flux and all - cooling in the vice.


From now on, the work is largely cosmetic - cleaning up around the bottom bracket, tapping the threads in the BB and generally cleaning up around the edges - aka shorelines - of the lugs. But basically, you could whack some wheels and a groupset on this thing and ride it now.

Friday, April 8, 2011

Adding the final touches...

First the braze-on stop for the rear derailleur cable. Obviously it's running on the underside of the drive-side chainstay. First I cleaned up the chainstay with some fine sandpaper to get it nice and clean...


...then fluxed it up and put a tiny blob of silver filler onto the tube...
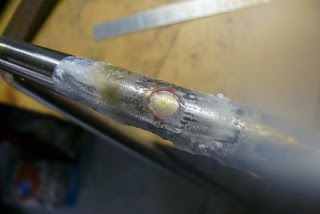


...then put the clean, fluxed stop on top of the silver, weighted it down with my 'brazing finger' and gently sweated it with the torch until the whole thing came up to temperature and the silver flowed neatly around the cable stop.
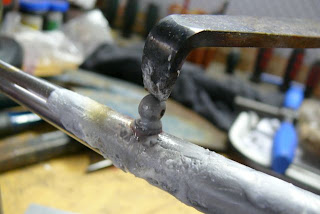


Hard to see with the flux still in place, but it's got a neat radiused fillet of silver around it, blending with the tube nicely.
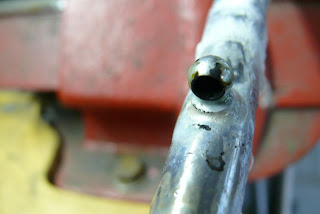


Next, the rear brake bridge. I'm sure there are simple and fast ways of doing this, but I didn't want to take the risk of buggering it up as (a) it's my last brake bridge of this type and (b) the closer I get to finishing this frame the less I want to mess anything up. So I scribed some lines on the bridge - same distance from the edge on each side - and used the lines to ensure that I kept both sides of the bridge even as I was trimming it to length. I would file it down with a round file and then smooth out the filed scallop with a grinding stone I'd dressed to be the same diameter as the seat stay.
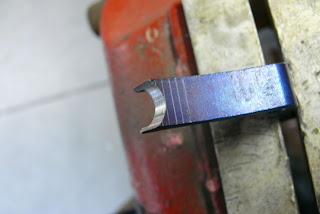


Because of the curved nature of the bridge, I had to have some way of knowing when the brake hole was at the correct height, so I ran a piece of tape across it to give me a reference.
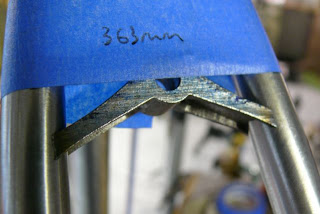


And after a lot of patient filing and grinding, this was the result: a very neat tight fit with no gaps. Should braze up very nicely indeed.


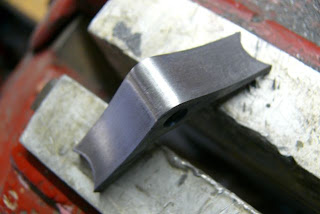
And below, the finished bridge, ready to go in. I'll braze this in tonight, which just leaves the chainstay bridge till it's all finished.


Edit:

The next day, post clean-up...
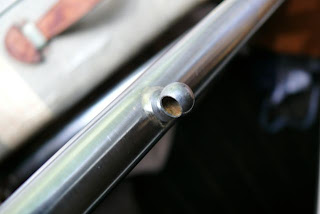


And the brake bridge. As I was doing all of the mitering to get this to fit I was cursing the design of the bridge and it's v-shaped profile. Compared to a straight bridge it's a pain in the arse to fit. But all faults were forgiven once I soaked the flux off. All of the effort in getting a tight miter paid off and it looks fantastic. Will definitely use these again.