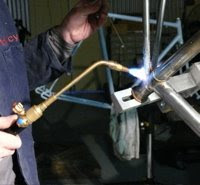
The first job was to tweak the lugs so that they matched the desired frame angles. Fortunately, the lugs were all within 1 degree of the desired angles, so the amount of grinding, bending and general panel beating was fairly minimal. Upper head lug, lower head lug and seat lug all got the treatment, with the seat lug needing the most intervention.

With that out of the way, I could move onto the last of the sub-assemblies - the chainstays. I'm using oval Zona chainstays, which are lovely, but because they are oval and can only fit into the BB shell one way, you need to get the dropouts positioned right. So, first I sprayed the tips in layout blue and mounted them in the BB shell...

...then ran a file along the top and bottom to get a reference line to keep the dropout slot in phase with the oval section...

... then slotted the tip with a combination of hacksaw and warding file...

... trial fit with the dropouts. DB wants short horizontal drops with mudguard eyes, giving him the option to run geared or singlespeed. I'll get some mudguards off him in the next week or so so I can do a trial fit-up of the whole rear end before deciding on chainstay length.

Both chainstays fitted up, with a dummy axle between them to ensure that they are in phase with each other. I got the dummy axles a couple of years ago with some disc brake tab jigs. next to the tube blocks you see in a lot of the photos, they are about the most useful tools I use. I'd be lost without them.
next steps: Brazing up the chainstay tips and shaping the ends, and setting up the jig and fitting it with the main tubes and lugs.

No comments:
Post a Comment